Mamiya 500 1000 DTL TL Placement Guide
Mamiya 500 1000 DTL TL Placement Guide
Before doing anything, please go here. The information provided will improve the quality of your light seal kit installation.
Mamiya 500 1000 DTL TL Placement Guide
For more information on purchasing this kit, go here.
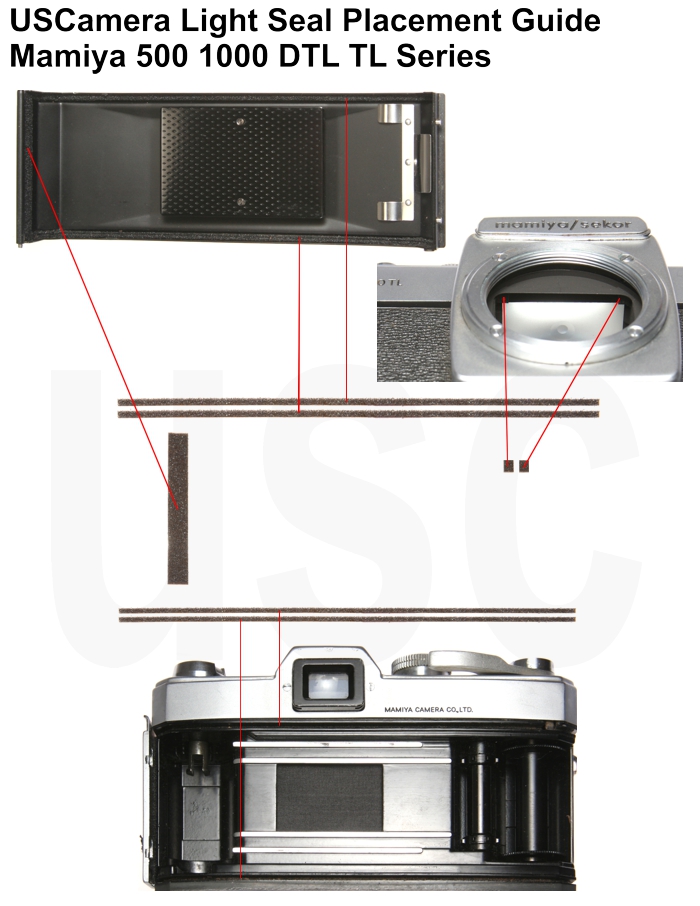
You are installing a 7 piece kit plus* for the Mamiya 500 1000 DTL TL
This light seal kit includes.
Lower channel seal, camera body – 1 x 1mm
Upper channel seal, camera body – 1 x 1mm
Mirror cushion – 2 x 1mm
Bottom channel seal, back cover – 1 x 1mm
Top channel seal, back cover – 1 x 1mm
Hinge seal, camera body – 1 x 1mm
The Plus* means…. I never could get an answer from Osawa and Company, they distributed Mamiya in the USA at first. My question to them was… “Why so many different mirror damper cushions on the 500 1000 DTL TL camera models” Many had a rubber cushion or felt type in the front corners of the finder frame. Those types of cushions are probably fine and do not need to be removed and replaced with foam.
Other cameras had a full length cushions, 2 different thicknesses of foam. So, I include 3 different types of mirror cushions in this kit. I am sure one of them will work for your camera.
General Installation Prep
Tech Note. It is easier to install the back cover hinge seal and the channel seals on the back cover with it removed from the camera (but not necessary).
To do so, you will need to remove the bottom cover. First remove the rewind button. Important!! The rewind button is a left hand thread. To remove it, carefully insert the points of straight tweezers or another similar type tool, into the 2 holes on the button. Turn the tool clockwise and the rewind button will unscrew.
Watch carefully, Mamiya installed washers on many a rewind button to make sure it was spaced properly from the bottom cover, very important they are re-installed.
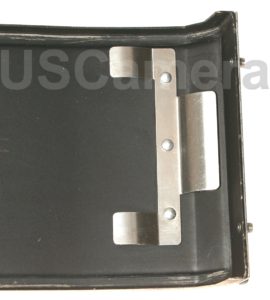
Now remove the four screws retaining the bottom cover. With the cover removed, locate the hinge pin plate and loosen the 2 brass screws holding the pin retaining the plate to carefully angle enough to clear the hinge pin.
Start Light seal installation.
Door channel seals, back cover. On the door latch end of the film back, measure 3mm down from the edge of the back -into the upper door channel and mark it with a pencil. Measure and mark the lower door channel the same. This is the starting point for the back cover channel seals.
Starting at the mark you made, remove the backing and install the upper seal on the back cover from right to left. Do the same for the lower seal. The images below show the seal start position.

Hinge seal on back cover.
This seal is installed by centering the seal between the upper and lower door channels on the back cover.
Door channel seals, camera body.
When installing the channel seals on the camera body, always start at the hinge side and work to the left. The top and bottom body seals are the same length. When installing the upper seal, cut off a 21mm long piece and install that seal starting at the hinge side to the counter lever. Then install the rest of upper seal from the other side of the counter lever to the rewind end of the camera. Then install the lower channel seal on the camera body.
Back cover latch end / body seal.
This seal is located under the door latch assembly. If you remove the leatherette on the door latch cover it will expose 2 slotted brass screws. Tech Note. As you remove the latch assembly, watch for the door latch spring under the latch plate as you remove the latch cover, it can be launched across your room and lost if you are not watching for it.
Mirror Cushion. Tech Note.
Many production units of these Mamiya models did not use a foam mirror cushion. A special type of feltor rubber was used and this does not need replacement. We do not recommend removing the felt or rubber cushion.
However if your camera uses a foam cushion we have included that in this kit. If your mirror cushion needs replacement with the utmost care, remove the old and install a new mirror cushion.
Remember if any thing touches the focusing screen, it will likely be permanently damaged.
Reverse the order of disassembly above to replace the bottom cover and back cover latch assembly.
Congratualtions, you have completed the light seal kit install.
USCamera Since 1998 | Pro Light Seal Installation Available | Light Seal Kits | Vintage Film Cameras | Mamiya 500 1000 DTL TL Placement Guide
Lastly, always made to inspire…see New film camera products.