Kowa Super 66 Light Seal Install
Kowa Super 66 Light Seal Install Help
Before doing anything, save time and frustration, please read general install/removal help.
Kowa Super 66 Light Seal Install
For more information on purchasing these kits film back and camera body
Kowa Super 66 – Body – Film Back
I always recommend to take pictures where the foam is placed on your equipment before you remove anything.
Also, never use any metal tools ie. dental picks or small flat screwdriver blades to remove old foam. It will scratch and damage the paint/coating. Use only wooden tools like toothpicks, and bamboo tools. You can hand sand hardwood to a sharp point or chisel edge as needed.
Camera Body – 4-Piece Kit

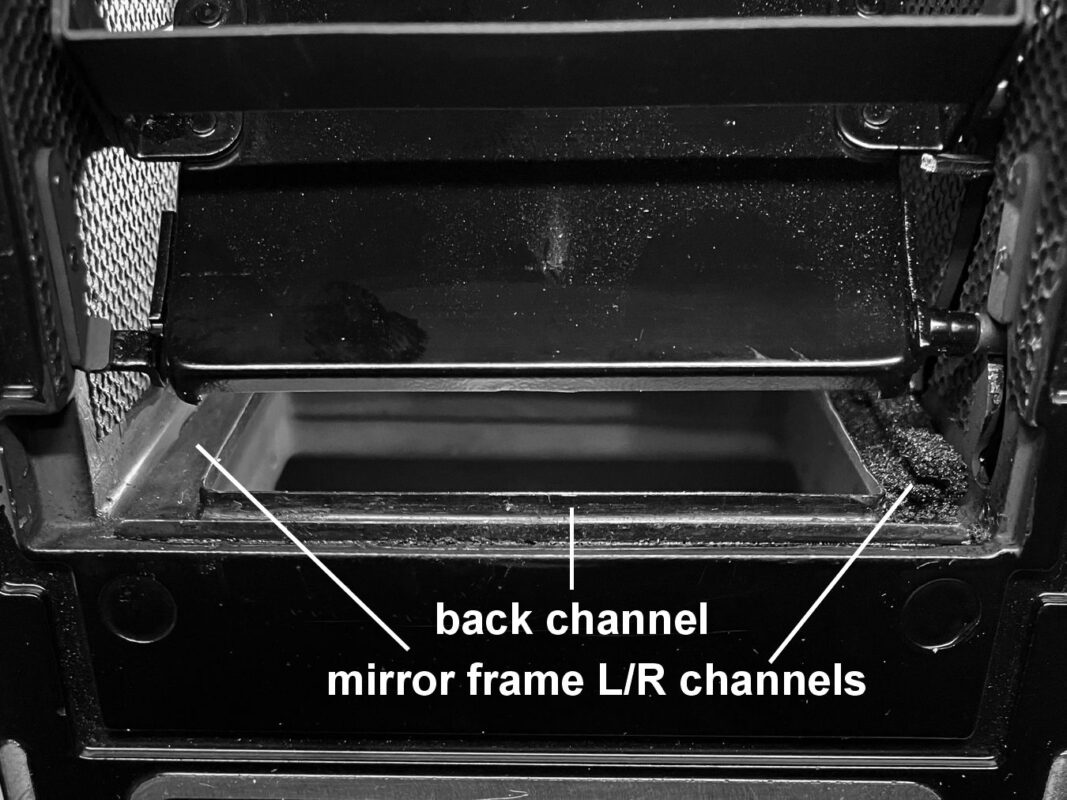
The only foam used externally on this camera body is located on the finder frame. Visible when you remove the film back, and focusing screen assembly. This frame is glued to the body casting with a commercial grade adhesive. I used some solvents to test if the adhesive could be easily softened so the frame could be removed to no avail. It would take much time (hours) to remove the frame which needs to remain perfectly straight as when first installed.

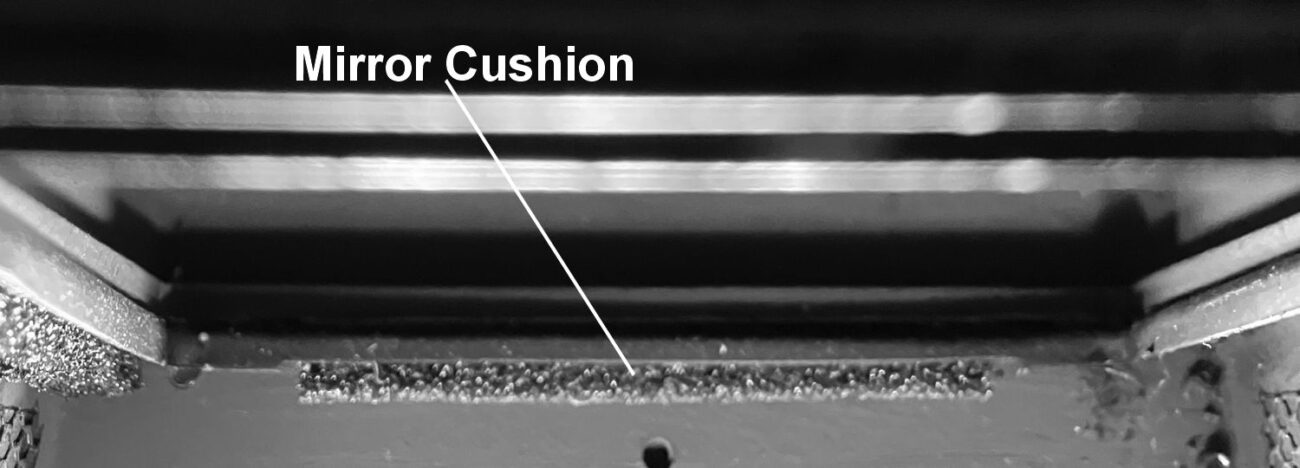
There lies the problem in replacing the front mirror cushion, and the left/right mirror frame foam. It is very difficult to remove all the old foam from the frame, though it needs to very clean. Whatever works for you. I found it best to lay the camera on the left side when removing the old foam from the right or left sides. On its side, as you removing the old foam, it will fall away from the mirror.

The front mirror cushion was easier to remove by using a dental mirror to see the foam. I used a bamboo tool to pick at the foam. When most of the foam is removed, I use solvent on a Kimwipe wrapped around a bamboo tool to remove the remaining debris.

It is very important to remove all of the old foam so the new seal lay perfectly flat. See the pic of the rear pic of the finder left seal after removal.

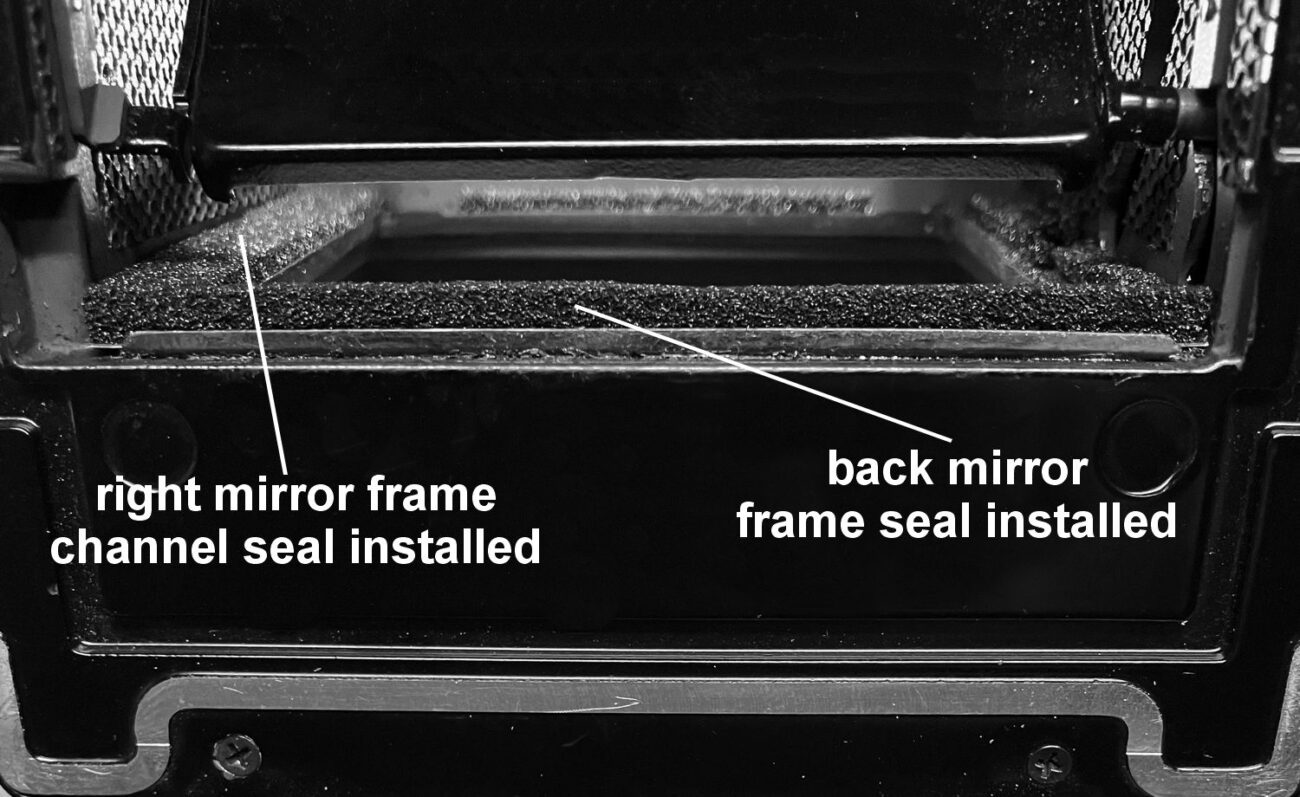
The last body seal you will install is the back frame seal. That seal needs to butt up against the F/R frame seals the best you can.
Film Back – 8-piece Kit
Foam is required on the removable back cover, and shell, which attaches to the camera body.

Kowa Super 66 Film Back Seals
Removable Film Back
2 – Channel Seals – 1.5T
Film Back – Back Cover – Latch End
1 – Channel Seal Latch End – 2.0T
2 – Left – Right Short Seals – 2.0T
Film Back – Back Cover – Hinge End
1 – Channel Seal – 1.5T
2 – Left – Right Short Seals – 1.5T
As I looked at the film back for making a kit, it was obvious non-adhesive foam was used. I can supply kit for those who want one. Let me know.that here soon.
The most important and time consuming work is removing the old seals. Focus on clean, clean, clean. Clean the old residue from the door channels, mirror cushion area, door hinge area and anywhere else you are replacing the seals. The finest adhesive in the world will not adhere to that sticky, gooey residue that was once a quality light seal. Proper installation will give you thousands of light tight exposures.
USCamera light seals are only made from the finest black open cell foam Made in Japan. We have searched everywhere for other products for cameras and tested many samples of open cell foam. No other foam we have found even comes close.
Shop all USCamera light seals.
USCamera Since 1998 | Pro Light Seal Installation Available | Light Seal Kits | Vintage Film Cameras | Kowa Super 66 Light Seal Install
Lastly, always made to inspire…see New film camera products.


