Blog Post
18
Aug
USCamera Light Seal Placement Guide | Canon Pellix
Before doing anything, go here
For more information on purchasing this kit, go here
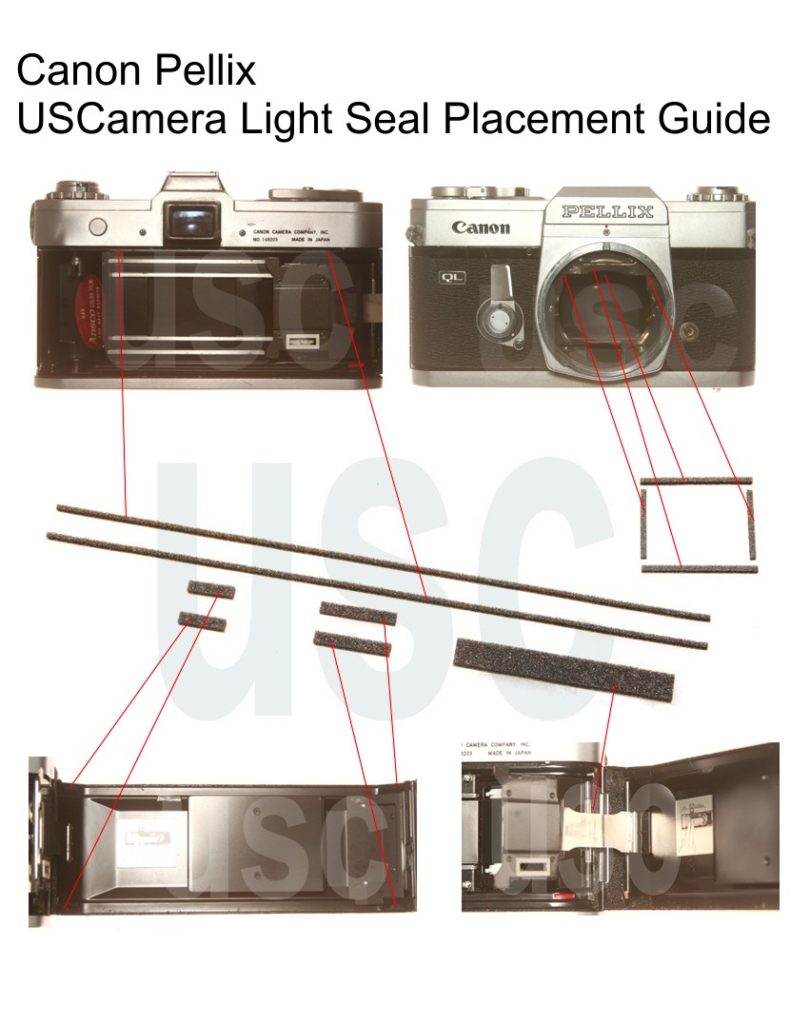
The most important and time consuming work is removing the old seals. Focus on clean, clean, clean. Clean the old residue from the door channels, mirror cushion area, door hinge area and anywhere else you are replacing the seals. The finest adhesive in the world will not adhere to that sticky, gooey residue that was once a quality light seal. Proper installation will give you thousands of light tight exposures.
USCamera | Thousands of parts for cameras, flash, lenses, light seals, foam sheets, downloads plus more. USCamera Light Seal Placement Guide | Canon Pellix
About the Author: Gray
1979 graduate of National Camera's resident camera repair school. I worked as a technician for a large Denver camera service center performing repair and service both in and out of warranty for over 38 brands of photographic equipment, accumulating over 5000 hours of bench time.
As a self-employed contractor and general technician, I accumulated another 40,000 hours of bench time working on 110mm, 35mm, medium format film cameras, lenses, flash, enlargers, timers, paper processors, long roll portrait cameras and more.
I have worked on most equipment made. The challenge of successfully taking anything photographic apart and reassembling it into an accurately working piece... and you could not tell I took it apart, was enough for me.
I do not work on studio flash. I don't care much for Alpha, Bronica S2 S2a, Leica R, Contaflex cameras and a few others. Generally, I do not work on customer equipment anymore. I have plenty of my own cameras to maintain as well as few collections for other collectors.
Related Posts
USCamera Light Seal Placement Guide | Canon Canonet 17 Before doing anything, please go here For
August 19, 2018