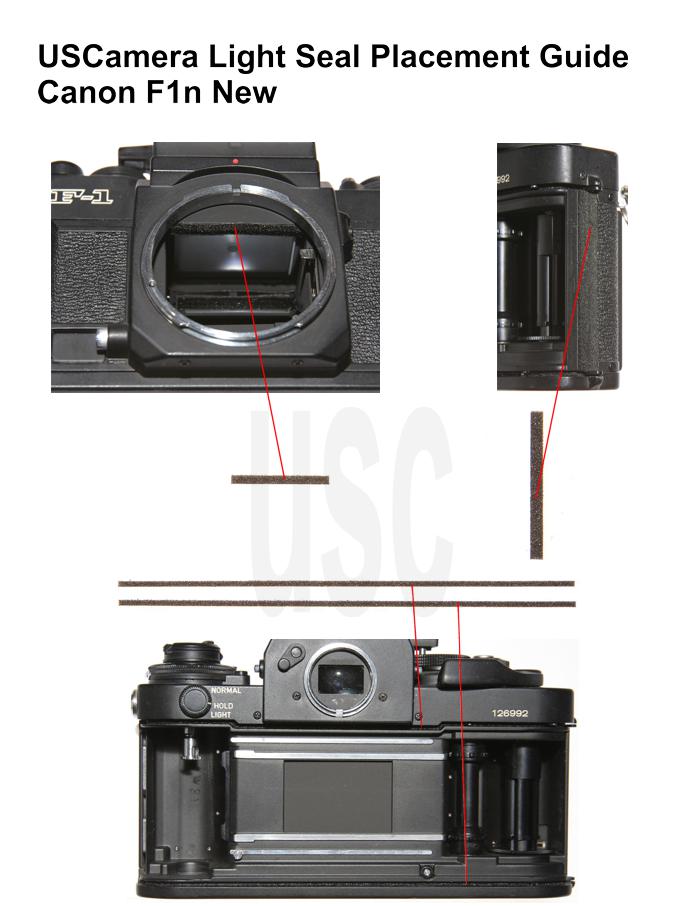
Canon F1n New Placement Guide
Canon F1n New Placement Guide
Before doing anything, please go here.
Canon F1n New Placement Guide
For more information on purchasing this kit, go here.
You are installing a 4 piece kit fits Canon F1n New
Take all of the seals out of the kit and lay them out on your work area. This kit includes,
2 x 1mm – channel seals, camera body
1 x 1mm – hinge seal, camera body
1 x 2mm – mirror cushion
Please note. The New F1 has 2 openings in the top channel seal on the camera body and one on the bottom channel. On the top channel, closest to the door hinge is the counter engagement/reset lever. Approximately 27mm to the left is the rewind lock lever. Both of those levers reset when the back cover is opened. The bottom channel lever is the film end switch lever, tells the camera when film is on the spool or not. You do not want to cover any of these levers with foam.

The most important and time-consuming work is removing the old seals. Focus on clean, clean, clean. Clean the old residue from the door channels, mirror cushion area, door hinge area and anywhere else you are replacing the seals. The finest adhesive in the world will not adhere to that sticky, gooey residue that was once a quality light seal. Proper installation will give you thousands of light tight exposures.
New or Old F1n? The F1n New uses a 6volt PX28 battery.
USCamera Since 1998 | Pro Light Seal Installation Available | Light Seal Kits | Vintage Film Cameras | Canon F1n New Placement Guide
Lastly, always made to inspire…see New film camera products.


