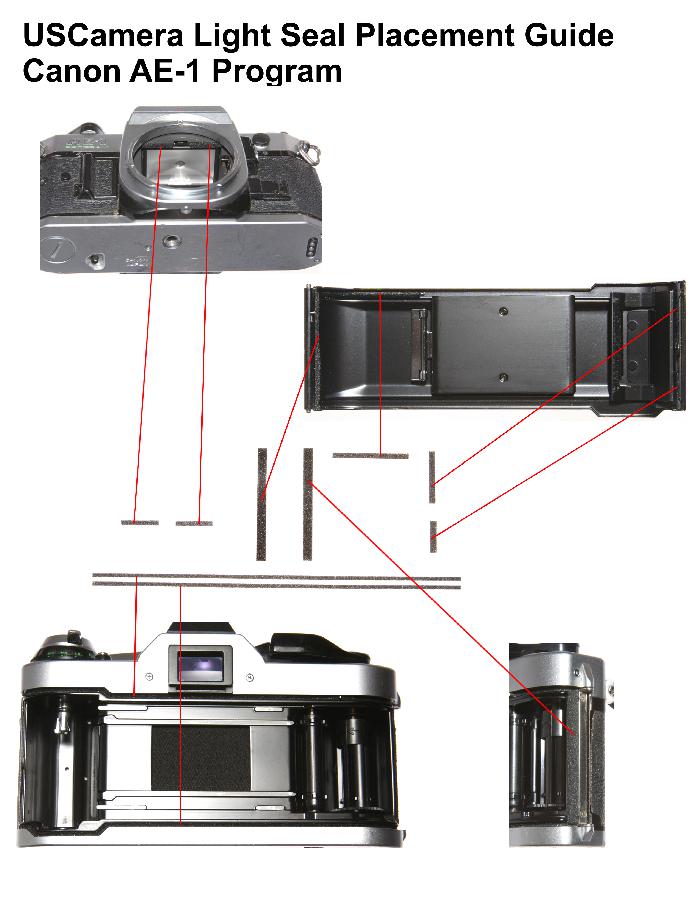
Canon AE-1 Program Light Seal Placement Guide
Canon AE-1 Program Light Seal Placement Guide
Before doing anything, please go here
Canon AE-1 Program Light Seal Placement Guide
For more information on purchasing this kit, go here
You are installing a 9 piece kit for the Canon AE-1 Program
Take all of the seals out of the kit and lay them out on your work area. This kit includes,
Channel seals, camera body – 2 x 1mm
Channel seal, back cover, top channel, hinge end – 1 x 1mm
Mirror cushion, right /left – 2 x 2mm
Hinge seal, back cover – 1 x 1mm
Hinge seal, camera body – 1 x 1mm
Top latch plate seal, back cover – 1 x 1mm
Bottom latch plate seal, back cover – 1 x 1mm
Tech Note. The light seal material supplied for the door latch plate on the back cover and the upper channel seal, hinge end, should only be replaced if damaged or missing. This material a special and normally does not need replacement. I have purchased many cameras that use this type of material and it may look very worn or damaged. Actually most look kind of like that when new only, a little darker in color than now, 30 years later. I only recommend replacing those 3 pieces if missing.

The most important and time-consuming work is removing the old seals. Focus on clean, clean, clean. Clean the old residue from the door channels, mirror cushion area, door hinge area and anywhere else you are replacing the seals. The finest adhesive in the world will not adhere to that sticky, gooey residue that was once a quality light seal. Proper installation will give you thousands of light tight exposures.
USCamera | Thousands of parts for cameras, flash, lens, light seals, foam sheets, downloads + more


