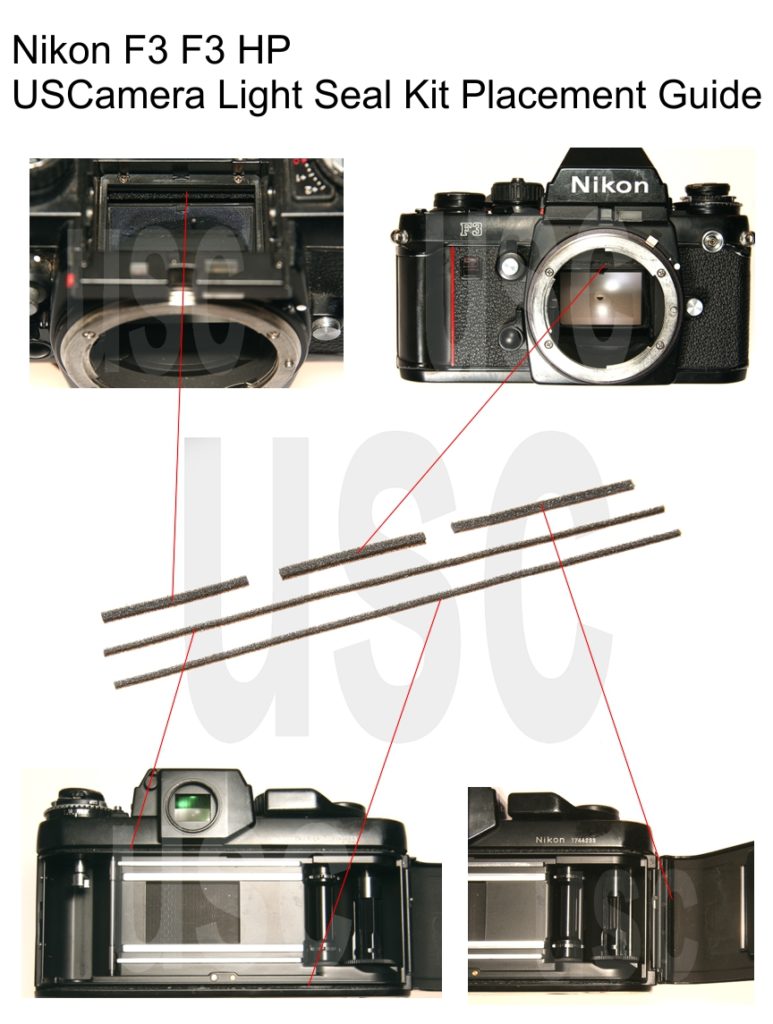
Nikon F3 F3HP Placement Guide
Nikon F3 F3HP Placement Guide
Before doing anything, go here
Nikon F3 F3HP Placement Guide
For more information on purchasing this kit, go here
This 5 piece kit includes,
Top door channel seal on the camera body – 1 x 1mm
Bottom door channel seal on the camera body – 1 x 1mm
Mirror frame cushion at mirror pivot (remove prism/focusing screen to easily see) – 1 x 2mm
Mirror cushion – 1 x 2mm
Door hinge seal on the back cover – 1 x 1mm
Install notes.
The door channel seals are installed like most cameras. Start at the hinge end and install them until used up. That will leave about 6 – 8mm or so of clean channel at the latch end.
You may have a bit more left with top channel seal as you have to cut it for the counter lever opening. You will want to remove the excess to match the lower channel.

The most important and time-consuming work is removing the old seals. Focus on clean, clean, clean. Clean the old residue from the door channels, mirror cushion area, door hinge area and anywhere else you are replacing the seals. The finest adhesive in the world will not adhere to that sticky, gooey residue that was once a quality light seal. Proper installation will give you thousands of light tight exposures.
USCamera Since 1998 | Pro Light Seal Installation Available | Light Seal Kits | Vintage Film Cameras | Nikon F3 F3HP Placement Guide
Lastly, always made to inspire…see New film camera products.


Hi there,
I have a Nikon FA film camera, my question is: the foam damper strip for the mirror seems to have a middle section indentation, so a replacement strip would sort of sink down over that area. Is this strip just to damp the mirror or is it also a light seal and if it is a light seal how do I cover over the indented area?
Hope that made sense?
Norman
I install the mirror cushion, then I cut a small piece of paper, just big enough to cover the exposed adhesive. Black paper would be ideal, however you can use white and color it with a black magic marker. Let me know if you have more questions. Gray