Fuji GW690-III GSW690-III Placement Guide
Fuji GW690-III GSW690-III Placement Guide
Before doing anything, please go here
Fuji GW690-III GSW690-III Placement Guide
For more information on purchasing this kit, go here
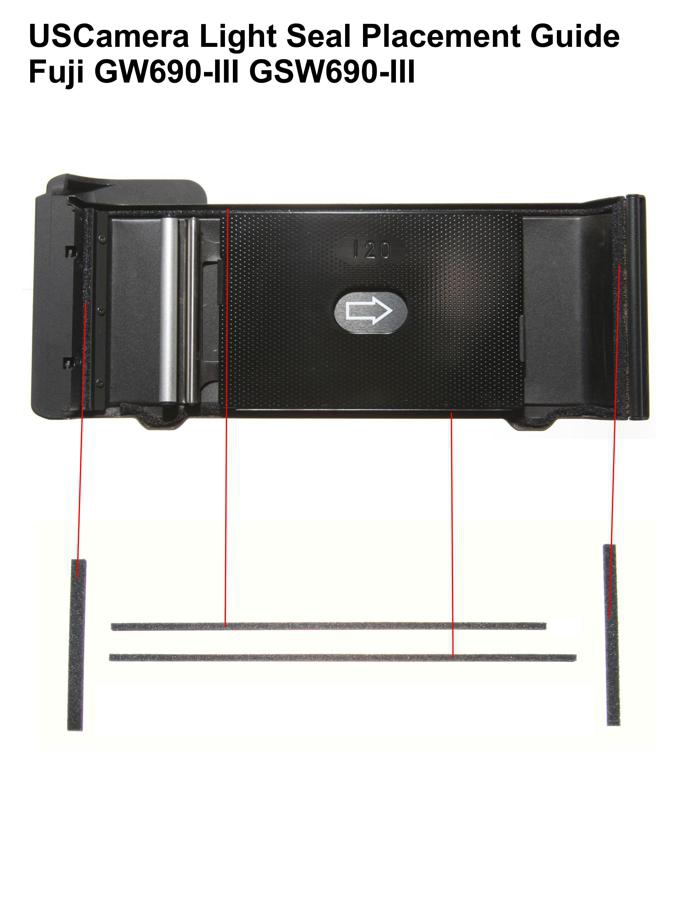
You are installing a 4 piece kit for the Fuji GW690 III or a GWS690-III
This light seal kit includes,
Bottom channel seal, back cover – 1 x 3mm
Top channel seal, back cover – 1 x 3mm
hinge seal, back cover – 1 x 3mm
latch end baffle plate seal – 1 x 3mm
Tech Note. I never tried to understand why camera engineers do what they do, I just follow the service manuals and part lists.
However, I do notice when changes are made like the first model, Fuji 690 didn’t use channel seals on the camera body. The 2nd did and the 3rd model didn’t. Odd.
General Installation guide for the FUJI GW690-III and Fuji GSW690-III light seal kit
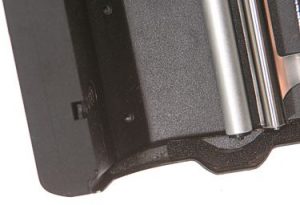
First, you need to remove the latch end baffle plate to replace the seal on that plate. Three screws are plainly visible at the latch end of the rear cover.

Also, it is a little easier to remove/replace the top and bottom channel seals while the latch plate is removed.
Please note the back cover channel seals are different in length. The shorter seal is for the top channel, the longer for the bottom channel. It is normal for the bottom channel seal to leave a 5-10mm gap at the end.

Very important to install the hinge seal first. Next butt the channel seal up against the hinge seal, then install the seal in the channel until it is used up.
Also. the 3 screws you need to remove are not bonded in place and are screwed into plastic on the 690-III. Use care when installing the screws. Do not over-tighten.
Tech Note: To prevent damage to the screw head, using a screwdriver made for Japanese camera screws is required. Known as JIS (Japanese Industry Standard) and JCIS ( Japanese Camera Industry Standard. Japanese camera Phillips screws are absolutely different from other Phillips screws. Other screwdrivers sized 00 and 000 will fit, eventually, they will damage the screw head as the non JCIS screwdriver tip will bottom out in the screw head before full contact is made with the drive of the screw. Just FYI.
Fuji GW690-III GSW690-III Placement Guide
Also, many camera screws are bonded in place on professional cameras.
Lastly, it is much easier to replace the seals on the back cover with it removed from the camera body. Dis-assembly is required. You might want to remove the top cover. Though you will have to remove all the TC screws. You will also have to remove the left front cover to access the door hinge screws. I will write that process if I get enough requests. Let me know.

Fuji GW690-III GSW690-III Placement Guide
Also, see all USCamera light seal kits for Fuji, Fujica and more, start here.
USCamera Since 1998 | Pro Light Seal Installation Available | Light Seal Kits | Vintage Film Cameras | Fuji GW690-III GSW690-III Placement Guide
Lastly, always made to inspire…see New film camera products.


Hello,
I pan on ordering these parts to replace the light seal on my GW690. Can you offer any advice on disassembly of the back cover? Also, would you recommend Naptha over something like Isopropyl Alcohol for cleaning off old light seal residue?
Best Regards,
Jason Crowley
I will write a disassembly guide for removing the back cover of the GW690III.Hopefully that will help. Jerry
THANK YOU! for being a great source for light seals and wisdom!!
Thanks.